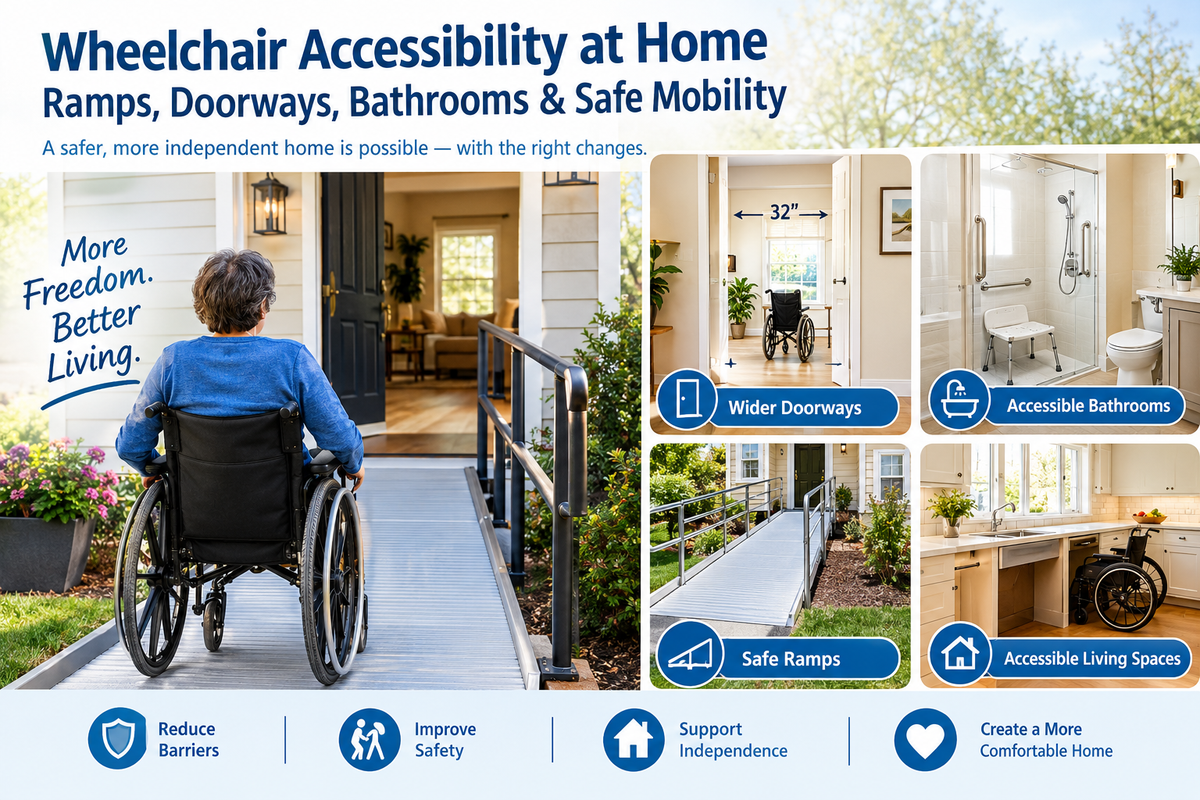
Creating a wheelchair-accessible home starts with making everyday routes easier, safer, and more predictable. Ramps, doorways, hallways, bathrooms, flooring, and transfer areas all affect how easily a person who uses a wheelchair can move around independently.
A wheelchair-accessible home does not necessarily require a complete renovation. Many homes can become more accessible through practical changes such as improving entryways, widening or adjusting doorways, removing floor obstacles, adding bathroom support equipment, improving lighting, and creating enough turning and transfer space.
The goal is simple: make essential areas of the home accessible while reducing unnecessary barriers and difficult transfers.
Important: ADA accessibility standards are primarily written for covered public accommodations and other facilities, not as a universal checklist for private residences. However, ADA dimensions can provide useful reference points when planning accessible spaces. For major remodeling, consult a qualified contractor, occupational therapist, architect, or accessibility professional.
At-a-Glance: Wheelchair Accessibility at Home
| Home Area | Common Barrier | Accessibility Goal | Practical Solution | Ideal For |
|---|---|---|---|---|
| Entryway | Steps or raised thresholds | Create a smooth entrance | Ramp, threshold ramp, platform lift | Wheelchair users entering independently |
| Doorways | Narrow openings | Provide adequate clear passage | Wider doorway, swing adjustment, offset hinges | Manual and power wheelchair users |
| Hallways | Clutter or tight turns | Maintain a clear route | Remove furniture and obstacles | Everyday room-to-room mobility |
| Flooring | Thick rugs, loose mats, uneven surfaces | Create stable rolling surfaces | Secure/remove rugs and repair transitions | Manual wheelchairs and rollators |
| Bathroom | Limited maneuvering space | Improve access and transfers | Grab bars, shower chair, accessible layout | Bathing and toileting |
| Toilet Area | Difficult transfers | Provide stable support | Grab bars, raised toilet seat, commode | Users with transfer limitations |
| Kitchen | High counters and restricted space | Improve reach and movement | Clear floor space, accessible storage | Independent meal preparation |
| Bedroom | Tight spaces around bed | Make transfers easier | Rearrange furniture and create clearance | Bed-to-wheelchair transfers |
| Exterior Paths | Uneven pavement or steps | Provide a continuous route | Ramps, smooth pathways, threshold solutions | Home entry and outdoor mobility |
What Makes a Home Wheelchair Accessible?
A wheelchair-accessible home provides a reasonably continuous route between the places a person uses most often.
For example, an accessible route might connect:
Driveway → Front Door → Living Room → Bedroom → Bathroom → Kitchen
The route should be free from unnecessary obstacles and should provide enough space for the wheelchair user to move, turn, approach doors, and perform transfers.
The CDC identifies physical barriers such as steps, inaccessible entrances, and narrow doorways as factors that can restrict mobility and participation. Universal-design principles focus on making environments usable by as many people as possible.
Start With the Person, Not Just the House
Before changing the home, consider how the person actually moves through it.
Ask:
- Is the wheelchair manual or power-operated?
- Does the user self-propel?
- Can the person stand or transfer independently?
- Does a caregiver assist with transfers?
- Does the wheelchair have a large turning radius?
- Are there rooms the person needs to access every day?
- Is the person likely to use a walker or transfer device as well?
- Are bathroom transfers particularly difficult?
- Does the person need nighttime access to the bathroom?
A home that works for one wheelchair user may not work equally well for another.
Wheelchair Ramps: Creating Safer Home Entrances
Steps are one of the most obvious barriers to wheelchair access. A properly planned ramp can provide a smoother route between ground level and an elevated entrance.
The ADA Standards specify a maximum ramp running slope of 1:12 for covered accessible routes, meaning one inch of vertical rise requires at least 12 inches of horizontal run. Other requirements also apply, including ramp width, landings, handrails in applicable situations, edge protection, and surface characteristics.
For a private residence, these standards should not automatically be treated as a legal requirement. Instead, they can serve as a useful reference when discussing accessibility with a qualified professional.
How to Choose a Wheelchair Ramp
Consider:
1. Measure the Vertical Rise
Measure the height from the lower surface to the entrance.
A higher entrance requires a longer ramp when using a gradual slope.
2. Consider the Wheelchair Type
A manual wheelchair may require different ramp considerations than a heavy power wheelchair.
The user's weight, wheelchair weight, caregiver assistance, and ability to control the chair should all be considered.
3. Check the Available Space
A ramp needs sufficient horizontal space. If the home does not have enough room for a straight ramp, a switchback or other configuration may be considered.
4. Look at the Surface
The ramp should provide a stable, slip-resistant surface and should be kept free of snow, ice, leaves, water accumulation, and other hazards.
5. Consider Landings
Landings provide a place to rest and maneuver. The appropriate landing configuration depends on the ramp design and applicable standards.
Wheelchair Doorways: Width, Thresholds & Maneuvering Space
A doorway can look wide enough but still be difficult to navigate in a wheelchair because of the door frame, hinges, hardware, threshold, or approach angle.
The 2010 ADA Standards specify a 32-inch minimum clear opening for accessible doorways, measured with the door positioned at 90 degrees. The Standards also address maneuvering clearance and door hardware.
Again, these requirements apply to covered facilities rather than automatically to every private home.
How Wide Should a Wheelchair Doorway Be?
A 32-inch clear opening is an important accessibility reference point, but measuring the actual clear opening is more useful than measuring the door slab itself.
When evaluating a doorway, check:
- Clear opening width
- Door swing
- Door hardware
- Threshold height
- Approach space
- Turning space near the doorway
- Whether another door or wall blocks the wheelchair
A wheelchair user may have difficulty entering a doorway even when the opening technically meets a width measurement if there is insufficient maneuvering space.
Make Doorways Easier to Use
Consider:
- Lever-style handles instead of difficult-to-grip knobs
- Removing unnecessary door stops or obstructions
- Adjusting door swing where appropriate
- Using offset hinges when professionally appropriate
- Reducing or eliminating problematic thresholds
- Keeping the area outside the doorway clear
The CDC's universal-design guidance emphasizes easy-to-use handles and providing appropriate space for approach, reach, and movement.
Wheelchair Hallways & Living Areas
Once a wheelchair enters the home, the route should remain accessible.
Furniture placement is one of the easiest things to change.
Check These Common Obstacles
- Coffee tables
- Floor lamps
- Decorative baskets
- Loose rugs
- Pet toys
- Electrical cords
- Narrow furniture arrangements
- Boxes or storage containers
- Shoes near doorways
Instead of focusing only on hallway width, consider the entire route.
A wheelchair user may need to:
- Approach a doorway.
- Turn toward it.
- Open the door.
- Move through the opening.
- Turn into the next room.
- Position the wheelchair next to furniture or another surface.
The ADA Standards use a 36-inch minimum clear width for many accessible walking surfaces, with specific exceptions and additional requirements for passing spaces.
For a private residence, the appropriate dimensions depend on the wheelchair, room layout, and user's needs.
Flooring & Thresholds for Safer Wheelchair Mobility
Flooring should provide a stable, predictable surface.
Loose or thick rugs can interfere with wheelchair movement and may also create hazards for people who use walkers or transfer between surfaces.
Review These Areas
- Door thresholds
- Carpet-to-hard-floor transitions
- Bathroom flooring
- Kitchen flooring
- Outdoor-to-indoor transitions
- Loose rugs
- Floor vents
- Raised flooring transitions
Whenever possible, minimize abrupt changes in floor height.
If a threshold cannot be removed, a properly selected threshold ramp may provide a smoother transition.
Wheelchair-Accessible Bathroom: Safety & Transfer Planning
The bathroom is often one of the most important areas to address because it combines limited space, water, slippery surfaces, transfers, and personal care activities.
A bathroom accessibility plan should consider the complete sequence:
Enter → Turn → Approach sink/toilet → Transfer → Bathe → Exit
The layout should be evaluated around the person's actual wheelchair and transfer method.
Wheelchair Bathroom Accessibility Checklist
Consider:
- Adequate doorway clearance
- Clear approach to the toilet
- Stable grab bars where appropriate
- Accessible shower entry
- Shower chair or bench when appropriate
- Handheld shower head
- Slip-resistant flooring
- Accessible sink configuration
- Adequate maneuvering space
- Accessible storage
- Good lighting
- Easily operated faucets and controls
The ADA Standards contain detailed requirements for accessible toilet rooms, bathing facilities, grab bars, clear floor space, and other components in covered facilities.
For residential remodeling, have the bathroom evaluated according to the user's wheelchair, transfer method, and applicable local building requirements.
Grab Bars, Shower Chairs & Bathroom Transfer Equipment
Bathroom equipment should be selected according to the person's mobility and transfer abilities.
Grab Bars
Grab bars can provide a stable handhold when entering, exiting, standing, or transferring.
They should be properly installed into appropriate structural support. Avoid relying on towel bars or decorative fixtures for body-weight support.
Shower Chairs & Benches
A shower chair or bench can allow a person to bathe while seated rather than standing for the entire shower.
When selecting one, consider:
- Seat height
- Seat width
- Weight capacity
- Back support
- Armrests
- Shower dimensions
- Transfer requirements
- Drainage and slip resistance
Raised Toilet Seats
A raised toilet seat may reduce the distance required for some transfers. However, the correct height and stability depend on the individual.
Commodes
A bedside or over-the-toilet commode may be useful when bathroom access is difficult, especially when nighttime travel presents additional challenges.
Wheelchair Bedroom Accessibility
Bedroom accessibility is frequently overlooked.
The wheelchair user should have enough space to:
- Enter the bedroom
- Approach the bed
- Transfer from wheelchair to bed
- Access clothing
- Reach commonly used items
- Turn or reposition the wheelchair
Move unnecessary furniture away from the primary transfer area.
For caregivers, placing frequently used items within easy reach can also reduce repeated trips and unnecessary assistance.
Kitchen Accessibility for Wheelchair Users
A wheelchair-accessible kitchen should provide a clear route through the room and enough space to approach frequently used areas.
Consider:
- Clear floor space in front of counters
- Accessible storage
- Frequently used items at reachable heights
- Easy-to-operate cabinet hardware
- Lever-style or touch controls where appropriate
- Clear pathways between refrigerator, sink, and cooking area
Not every kitchen requires a complete remodel. Sometimes relocating frequently used items to lower or easier-to-reach storage makes a meaningful difference.
Safe Wheelchair Mobility Around the Home
Accessibility is not only about dimensions. It is also about reducing avoidable hazards.
Keep Pathways Clear
Check the wheelchair route every day for:
- Toys
- Shoes
- Packages
- Pet bowls
- Electrical cords
- Small furniture
- Loose rugs
- Cleaning equipment
Improve Lighting
Good lighting can help users identify changes in flooring, thresholds, furniture, and other obstacles.
Pay particular attention to:
- Hallways
- Stairs
- Entryways
- Bathrooms
- Bedroom-to-bathroom routes
Keep Frequently Used Items Accessible
Place commonly used items within comfortable reach rather than requiring repeated stretching, leaning, or assistance.
Avoid Sudden Changes
Sudden floor transitions, clutter, poorly positioned furniture, and difficult doors can make everyday movement unnecessarily challenging.
Wheelchair Accessibility for Caregivers
Caregivers should evaluate the home from the perspective of both the wheelchair user and the person providing assistance.
For example, a doorway may technically allow a wheelchair through but still leave insufficient space for a caregiver to help with positioning.
Think about:
- Where the caregiver stands
- Where the wheelchair approaches from
- Where transfers occur
- Whether equipment needs to be positioned beside the wheelchair
- Whether another person needs to pass through the area
- Where mobility equipment can be stored
The CDC recommends involving people with disabilities in the design and evaluation of environments because their direct experience can reveal barriers that others may overlook.
How to Make a Wheelchair-Accessible Home Without a Major Remodel
You do not always need to start with a full renovation.
Start with the highest-impact areas.
Step 1: Map the Daily Route
Write down the rooms the wheelchair user accesses every day.
For example:
Entrance → Living Room → Bedroom → Bathroom → Kitchen
Step 2: Identify Barriers
Look for:
- Steps
- Narrow doorways
- High thresholds
- Loose rugs
- Tight turns
- Bathroom transfer problems
- Poor lighting
- Hard-to-reach storage
Step 3: Prioritize Essential Areas
Address the route that is used most frequently before less-used rooms.
Step 4: Measure Before Buying Equipment
Measure:
- Doorway openings
- Threshold heights
- Hallway widths
- Bathroom dimensions
- Available ramp space
- Toilet height
- Shower dimensions
Step 5: Match Equipment to the User
A wheelchair ramp, shower chair, transfer board, grab bar, or raised toilet seat should be selected based on the person's actual mobility and equipment.
Common Wheelchair Accessibility Mistakes to Avoid
1. Measuring the Door Instead of the Clear Opening
The door slab's advertised width does not necessarily equal the usable opening.
2. Installing a Ramp Without Considering the Full Route
A ramp is only useful if the wheelchair can safely travel from the ramp to the doorway and through the entrance.
3. Using Loose Rugs
Loose rugs can interfere with wheelchair movement and create additional hazards.
4. Treating Bathroom Accessibility as an Afterthought
The bathroom often requires careful planning because of transfers, moisture, limited space, and multiple pieces of equipment.
5. Installing Grab Bars Incorrectly
Grab bars should be properly secured to appropriate structural support.
6. Ignoring Caregiver Space
If a caregiver assists with transfers, the layout should provide enough room for that assistance.
7. Buying Equipment Before Measuring
Measure first and purchase second. A product that looks appropriate may not fit the available space.
Wheelchair Accessibility Home Checklist
Use this quick checklist when evaluating your home:
Entry
-
No unnecessary steps or an appropriate ramp solution
-
Doorway has adequate clear opening
-
Threshold is manageable
-
Entry surface is stable
-
Lighting is adequate
Hallways
-
Main routes are free of clutter
-
Furniture does not block turns
-
Rugs are removed or securely fixed
-
Electrical cords are safely positioned
Bathroom
-
Doorway is accessible
-
Toilet approach is clear
-
Appropriate grab bars are installed
-
Shower entry is manageable
-
Shower chair or bench is available if needed
-
Flooring provides a stable surface
-
Lighting is adequate
Bedroom
-
Wheelchair can approach the bed
-
Transfer area is clear
-
Frequently used items are reachable
-
Route to bathroom is unobstructed
Kitchen
-
Main pathway is clear
-
Frequently used items are reachable
-
Appliances can be approached safely
-
Storage is organized for easy access
Frequently Asked Questions About Wheelchair Accessibility at Home
What is the most important part of making a home wheelchair accessible?
Start with the person's daily route. Focus first on the entrance, bedroom, bathroom, kitchen, and other areas used regularly. Removing barriers along this route can make the biggest practical difference.
How wide should a doorway be for a wheelchair?
The 2010 ADA Standards specify a 32-inch minimum clear opening for applicable accessible doorways. For a private home, the appropriate width should also account for the actual wheelchair, approach angle, door swing, and available maneuvering space.
What is the recommended wheelchair ramp slope?
The 2010 ADA Standards use a maximum ramp slope of 1:12 for covered accessible routes. Residential ramp planning should also consider available space, wheelchair type, user ability, surface conditions, landings, and applicable local requirements.
How can I make a bathroom safer for a wheelchair user?
Improve the approach and transfer areas first. Depending on the person's needs, this may include grab bars, a shower chair or bench, an accessible shower entry, appropriate toilet height, adequate maneuvering space, stable flooring, and better lighting.
Can I make my home wheelchair accessible without remodeling?
Yes. Some improvements are relatively simple, such as rearranging furniture, removing loose rugs, clearing pathways, improving lighting, adjusting storage, adding appropriate threshold solutions, and installing suitable bathroom equipment. Larger barriers such as stairs, narrow doorways, or inadequate bathroom space may require professional remodeling.
Final Thoughts: Build Accessibility Around Everyday Life
Wheelchair accessibility at home is about more than installing a ramp or widening one doorway. A truly practical setup considers the entire journey through the home—from entering the front door to moving between the bedroom, bathroom, kitchen, and living areas.
Start by identifying the most frequently used route. Measure the important spaces, remove unnecessary barriers, improve bathroom and transfer areas, and select mobility equipment that matches the user's wheelchair and abilities.
For larger modifications, work with qualified professionals and check applicable building requirements. The ADA Standards can provide useful technical reference points, but they should not be assumed to be a universal residential requirement.
Most importantly, involve the wheelchair user in the planning process. Their daily experience can identify barriers that may not be obvious to someone else.