Hair is one of the first things people stop being able to manage for themselves and one of the last things they stop caring about. Someone who cannot get to a shower will often mention their hair before they mention anything else, and for good reason: an itchy, greasy scalp is genuinely uncomfortable, and feeling unkempt affects mood in a way that is easy for a well person to underestimate.
Rinse-free hair washing solves this without water, drainage, or moving the person. Done properly it takes about ten minutes. Done carelessly it soaks the bed and puts someone at risk of a chill. This is how to do it properly.
When rinse-free washing is the right choice
- The person is on bed rest, or transferring to a bathroom is unsafe or exhausting
- After surgery, when activity restrictions, drains, or dressings rule out a shower
- A cast, external fixator, or wound dressing that must stay dry
- Cardiac or respiratory conditions where the effort and heat of a shower is too much
- Cognitive impairment, where showering causes real distress but hair still needs cleaning
- IV lines, catheters, or telemetry leads that complicate a full wash
- Between full washes, when a person tires quickly and a shower every few days is the realistic maximum
Check first, then wash
Before the first time, confirm a few things with the nurse, surgeon, or GP involved:
- Whether there are scalp or head incisions, sutures, staples, or a shunt site. Anything on the head changes the answer entirely.
- Whether the neck can be extended or the head repositioned. This matters after spinal, neck, or eye surgery.
- Whether the head of the bed can be raised, and how far.
- Whether there is a scalp condition, open sore, or pressure area being monitored.
- Whether any product restrictions apply because of skin sensitivity or allergy.
If the person has had a recent head injury or head surgery, do not improvise. Ask.
What to have ready before you start
Gather everything first. Leaving mid-procedure to find a towel is how people get cold and how a cap gets left on too long.
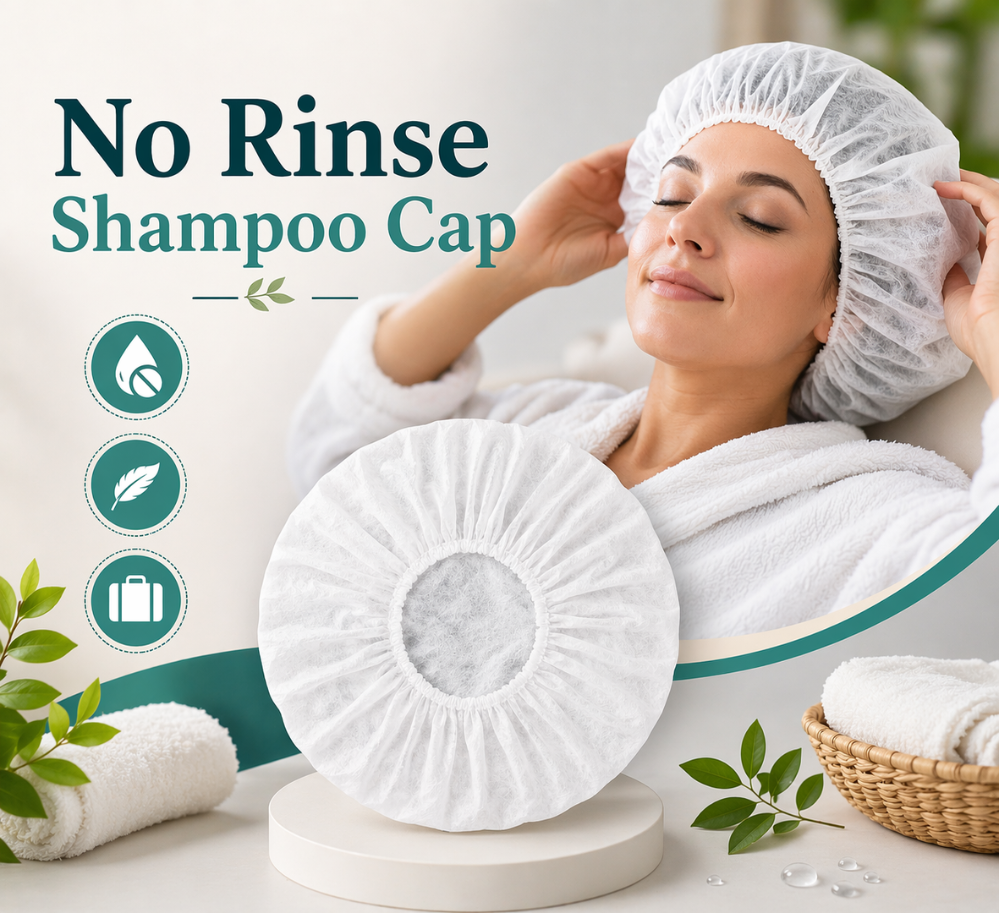
- A rinse-free shampoo cap, or rinse-free shampoo with a basin if you prefer that method
- Two towels: one for under the head, one for drying
- A waterproof or absorbent pad for under the shoulders
- A wide-tooth comb or a brush suited to their hair
- A clean, dry pillowcase to swap in afterwards
- Disposable gloves if there is any wound, skin condition, or infection risk
- A hair tie or clips for long hair
Positioning
- Explain what you are about to do before you touch them, every time, including if they are confused or unresponsive.
- Raise the head of the bed slightly if that is permitted and comfortable. Fully flat works, but slightly upright is easier for both of you.
- Slide a towel and absorbent pad under the head and shoulders, protecting the pillow.
- Support the neck as you lift the head. Do not lift by pulling on the head itself.
- Make sure the room is warm and there is no draught. A wet scalp cools quickly.
- Work from the side of the bed where you have space, and raise the bed to a height that does not wreck your own back.
Step by step
- Detangle the hair gently first, working from the ends upward. Cleaning matted hair without combing it first makes the matting worse.
- If you are warming the cap, do it now and test the temperature against your own inner wrist before it goes anywhere near their head. More on this below.
- Place the cap over the head, tucking all the hair inside. Long hair may need to be coiled up and held in place.
- Seat the elastic edge just above the ears and along the hairline, not over the ears or across the forehead.
- Massage through the cap systematically rather than randomly: front hairline, then the crown, then each side, then the nape. The nape and behind the ears are the areas most often missed and the areas that get greasiest.
- Work the scalp with the pads of your fingers, not your nails. Roughly one to two minutes of massage is typical, but follow the product instructions.
- Leave the cap in place for the time the manufacturer specifies, commonly a few minutes.
- Remove the cap and dispose of it. Do not reuse it.
- Towel dry the hair and, importantly, the scalp. Do not leave the head damp.
- Comb through from the ends up, and style or tie as they prefer.
- Swap the pillowcase and remove the wet pad and towel.
- Check the person is warm and comfortable before you leave.
A note on warming the cap
Warming makes the experience considerably more pleasant and helps the cleansing solution work. It is also the single most likely way to cause harm during this procedure.
- Only warm the cap if the manufacturer's instructions say you can, and only by the method they specify.
- Microwave outputs vary enormously. A time that is safe in one kitchen is not safe in another. Start well below the maximum suggested time.
- Always test the temperature on your own inner wrist first. It should feel comfortably warm, never hot.
- Be especially careful with anyone who has reduced sensation, diabetes, neuropathy, or who cannot reliably tell you they are uncomfortable. They may not react to a burn until damage has been done.
- Never warm a cap while it is on someone's head, and never use an oven or hot water above hand temperature unless instructed.
Long, thick, or matted hair
A single cap is sized for average hair volume, and long or very thick hair will not be cleaned properly by one.
- Expect to use two caps, or a cap for the scalp followed by a rinse-free product worked through the lengths.
- Detangle before, not after. Sectioning long hair with clips makes this manageable.
- Braid or loosely tie long hair afterwards to reduce the tangling that comes from lying on it.
- For hair that is already badly matted, a rinse-free cap will not solve it. That needs patient sectioning and a detangling product, sometimes over more than one session.
- If a fuller wash becomes possible, an inflatable basin or shampoo tray used at the bedside allows a proper rinse without moving the person to a bathroom.
Bedside washing equipment sits in the bathing supplies collection, and rinse-free products in bath care and skin care and beauty.
Check the scalp while you are there
This is a good opportunity to look at skin that nobody else sees.
- The back of the head is a genuine pressure point for anyone lying down for long periods. Look for persistent redness or any broken skin.
- Note flaking, scaling, crusting, or unusual odour and mention it to the care team.
- Look for scratches from scratching an itchy scalp, which can become infected.
- Report anything new rather than treating it yourself.
What to expect, and what not to
A rinse-free cap removes surface oil, sweat, dust and odour, and leaves hair feeling considerably better. It is a maintenance measure, not a deep clean. It will not fully remove heavy styling product, thick ointments, or medicated scalp treatments, and hair that has gone a long time between washes may need two sessions before it feels genuinely clean.
Frequency depends on the person: every two or three days suits most, daily is reasonable for someone sweating heavily or in a warm room. There is no benefit to leaving it longer to "save" caps. There is more on how these products compare with conventional washing, and on the misconceptions that put people off them, in the article clearing up common misconceptions about no-rinse shower caps.
Make it feel like grooming, not a procedure
Small things change how this lands. Ask before you start. Talk while you work. Let them hold the comb if they can. Finish the way they would have finished it themselves, with their usual parting and their hair tied the way they like it. Ten minutes spent this way often does more for someone's morale than anything else in their day.
Related equipment for washing, grooming and dressing without a full bathroom trip is grouped under aids to daily living.